Installing a masonry heater represents one of the most significant investments you can make in your home’s comfort and efficiency. Unlike a simple appliance, these substantial heating systems become a permanent architectural feature that will serve your family for generations.
Proper preparation ensures your installation proceeds smoothly and creates the foundation for decades of reliable heating performance. From structural considerations to aesthetic choices, thorough preparation transforms what might seem overwhelming into an exciting home improvement journey.
Understanding the Structural Requirements
The first and most critical consideration is understanding the substantial weight these systems add to your home’s structure. A completed masonry heater typically weighs between 4,000 and 10,000 pounds, depending on size and design.
This tremendous mass requires adequate structural support that many homes may not currently possess. Please contact Greenstone and we can help you evaluate the most effective way to support the load of your heater.
They’ll evaluate your floor joists, foundation, and subfloor to determine whether reinforcement is necessary. Many installations require adding supplemental floor joists, installing steel beams, or pouring a reinforced concrete pad to safely support the weight.
For first-floor/basement installations, the heater often sits on a reinforced foundation pad poured directly on the ground or basement floor. Second-story/main level installations generally sit on a steel post and beam or concrete and masonry support structure.
Don’t cut corners on structural preparation. The integrity of both your heater and home depends on this foundation.
Evaluating and Planning Your Space
Correctly sizing your masonry heater begins with understanding your heating needs and available space. These systems work best when centrally located in an open floor plan where radiant heat can distribute throughout your living area.
The ideal location provides access from multiple rooms, allowing the thermal mass to warm adjacent spaces effectively. Consider traffic patterns through your home and how a large masonry structure will affect room flow.
Measure carefully and create a scaled floor plan showing the heater’s footprint, required clearances, and furniture arrangement. Most building codes require specific clearances from combustible materials.
Key Space Planning Considerations:
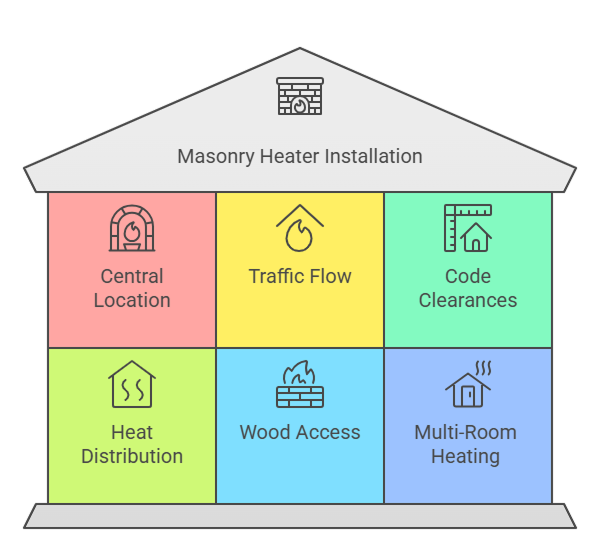
- Central Location: Position centrally in open floor plans for optimal heat distribution
- Traffic Flow: Ensure the footprint doesn’t block natural pathways
- Code Clearances: Typically 36 inches from front door, 4-6 inches from sides
- Heat Distribution: Open layouts work best for radiant heat transfer
- Wood Access: Plan convenient paths for firewood delivery
- Multi-Room Heating: Closed rooms may need supplemental circulation
Understanding how masonry heaters work through radiant heat transfer helps you assess which spaces will receive adequate warmth. The location should also provide reasonable access for wood delivery and storage.
Chimney Planning and Preparation
Every masonry heater requires a properly designed chimney system. The chimney must provide adequate draft to pull combustion gases through the heater’s internal channels while remaining weather-tight and structurally sound.
Your chimney options include traditional masonry chimneys built from brick or stone, or insulated metal chimneys designed for solid fuel applications. Each has advantages depending on your home’s architecture, budget, and installation constraints.
Masonry chimneys offer classic aesthetics and proven durability but cost more and require substantial structural support. Metal chimneys install more quickly and economically while providing excellent performance when properly specified.
The chimney must extend through your roof at an appropriate location. You’ll need to consider roof pitch, proximity to other structures, and local code requirements for chimney height above the roofline.
Interior chimneys that pass through conditioned space provide better draft and efficiency than exterior chimneys exposed to cold temperatures. However, exterior installations sometimes offer easier installation in existing homes.
If installing in a home with an existing chimney, have it thoroughly inspected. Many older chimneys have deterioration or design characteristics unsuitable for masonry heater applications.
Protecting Your Home During Installation
Create barriers between the construction area and the rest of your house using heavy plastic sheeting sealed with tape. Cover flooring in high-traffic areas with heavy-duty floor protection products designed for construction.
Installation Protection Checklist:
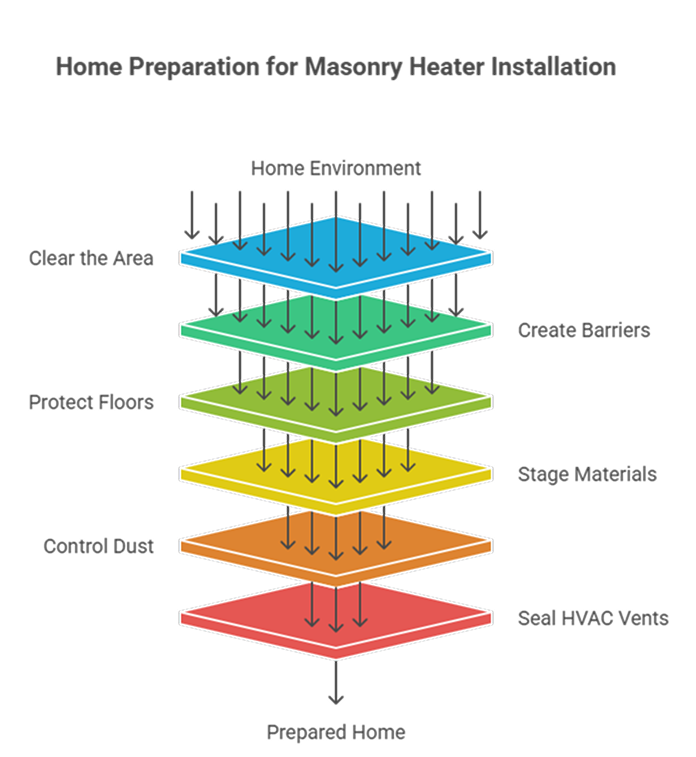
- Clear the Area: Remove furniture, artwork, and valuables from work zones
- Create Barriers: Use plastic sheeting to separate construction from living spaces
- Floor Protection: Cover with heavy-duty construction-grade materials
- Material Staging: Designate space for brick, stone, mortar, and supplies
- Dust Control: Consider air scrubbers or filtered fans
- Seal HVAC Vents: Prevent dust from spreading through your system
Plan for adequate material staging and storage. Your installation crew will need space for pallets of brick, stone, or soapstone, bags of mortar, and various tools.
For ground-floor installations, exterior doors or large windows near the location make material delivery easier. Second-floor installations require careful planning for moving extremely heavy materials upstairs safely.
Coordinating with Other Trades
A masonry heater installation often requires coordination with multiple contractors. Your general contractor or masonry heater specialist will manage much of this, but understanding the sequence helps you plan accordingly.
Structural work must be completed first, providing a stable platform before any masonry work begins. If you’re doing new construction or extensive remodeling, the heater installation typically happens during the framing stage.
Chimney installation must coordinate with roofing work, whether installing a new roof or penetrating an existing one. The roofing contractor needs to properly flash the chimney penetration to ensure a weathertight seal.
Electrical work might be needed if you’re incorporating lighting into the heater design or adding outlets near the installation. While masonry heaters themselves require no electricity, good task lighting near the firebox enhances usability.
If your installation involves removing an existing heating system, coordinate timing carefully so your home isn’t left without heat during cold weather. Many homeowners schedule installations during spring or summer.
Selecting Materials and Design Elements
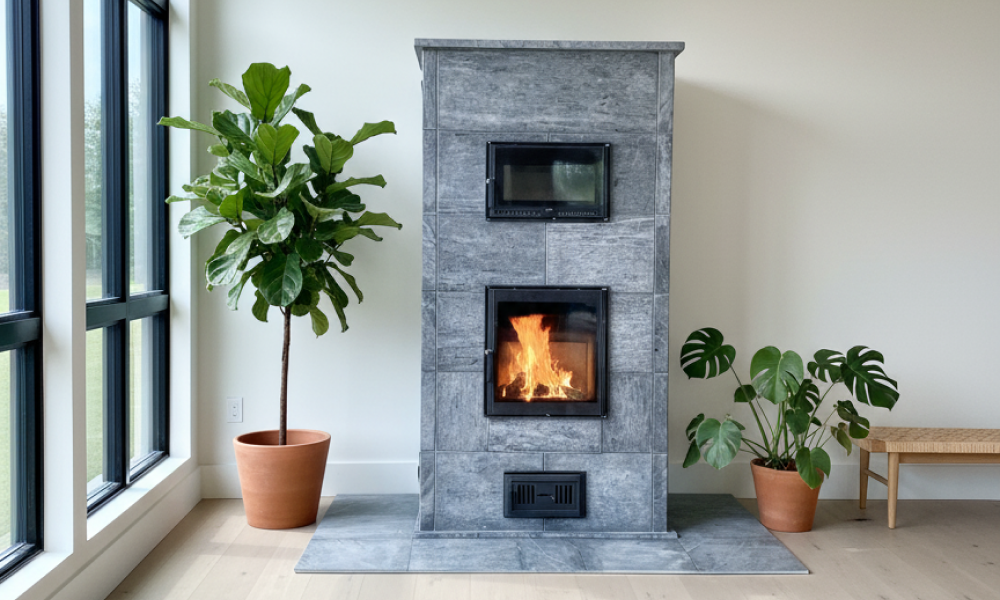
While your masonry heater builder will guide material selection, understanding your options helps you make informed decisions. The exterior veneer or facing is highly visible and should complement your home’s architectural style.
Options include natural stone like soapstone or granite, traditional brick, decorative tile, or stucco finishes. Each material offers distinct aesthetic qualities and requires different maintenance.
Soapstone is prized for its heat retention properties and develops a beautiful patina over time. It has a warm, organic appearance that fits both traditional and contemporary designs.
Brick veneers provide classic fireplace aesthetics and work well in traditional or rustic settings. Tile allows tremendous design flexibility with endless color and pattern options.
Consider whether you want viewing windows or doors that allow you to watch the fire. Glass doors add ambiance and visual interest but require regular cleaning.
Some designs incorporate bake ovens, warming shelves, or seating areas that expand your heater’s functionality. These features add cost and complexity but can significantly enhance your enjoyment.
The hearth must extend far enough from the firebox to meet safety codes while providing protection from sparks and embers.
Preparing for the Heating Transition
If you’re replacing an existing heating system with a masonry heater, prepare for the learning curve that comes with radiant heat. Unlike forced-air systems that respond instantly to thermostat adjustments, masonry heaters require you to think ahead.
You’ll fire the heater based on anticipated weather and desired comfort levels rather than reacting to current conditions.
Plan to have a good supply of properly seasoned firewood ready before your first heating season. Hardwoods like oak, maple, ash, or locust provide optimal performance when dried to below 20 percent moisture content.
This drying process generally takes two years. Budget for one to three cords of wood per heating season depending on your climate and home size.
Consider how you’ll measure and monitor indoor temperature and comfort. Some homeowners install simple thermometers in multiple rooms to understand heat distribution.
Unlike conventional systems with set-it-and-forget-it thermostats, masonry heating involves more active participation but rewards you with superior comfort and satisfaction.
Financial and Timeline Planning
Understanding the investment required for a masonry heater installation helps you budget appropriately. These systems typically cost between $8,000 and $25,000 or more, depending on size, complexity, materials, and regional labor rates.
Factor in additional costs beyond the heater itself. Structural reinforcement can add several thousand dollars. Chimney systems represent another significant expense. Site preparation, material delivery, and post-installation cleanup all contribute to the total investment.
Obtain detailed written estimates from your contractor that break down these various components.
Timeline expectations vary widely based on project complexity. A straightforward installation in new construction might take two to four weeks from start to finish. Retrofit installations can extend to six weeks or longer.
Weather delays, material availability, and contractor scheduling all affect timelines. Plan for the installation to be completed well before you need heating.
Starting a project in early fall leaves little margin for unexpected delays. Many experienced homeowners schedule installations for spring or summer, allowing ample time for completion before the heating season begins.
Final Preparation Steps
As installation day approaches, complete these final preparation tasks. Confirm delivery and staging areas with your contractor, ensuring clear access for vehicles and equipment.
Verify that any required permits have been obtained and inspections scheduled. Arrange for pets and young children to be elsewhere during the most disruptive phases of construction.
Communicate with neighbors about the project timeline and any temporary disruptions like delivery trucks, noise, or dust. Most neighbors appreciate advance notice.
Document your home’s condition before work begins with photographs of walls, floors, and nearby areas. This protects both you and the contractor by providing a clear record of pre-existing conditions.
Review the project scope and timeline one final time with your contractor, ensuring everyone understands expectations and deliverables.
Conclusion
Preparing your home for a masonry heater installation requires careful planning, realistic expectations, and attention to numerous details. From structural assessments to material selection, each preparation step contributes to a successful installation.
The effort invested in thorough preparation pays dividends in smoother construction, better results, and fewer surprises along the way.
Understanding how masonry heaters work and what they require helps you make informed decisions throughout the planning and installation process. These remarkable heating systems offer unmatched comfort, efficiency, and beauty when properly installed in well-prepared homes.
The investment of time and resources ensures your masonry heater becomes a cherished feature that enhances your home’s value and your family’s quality of life.
Ready to learn more about preparing your home for a masonry heater installation, or interested in discovering how a professionally installed system could provide decades of comfortable, efficient heating? Contact our team for expert guidance on installation planning and to discuss how a masonry heater could transform your home’s heating experience.
Frequently Asked Questions
How long does a masonry heater installation take?
A standard Greenstone installation typically takes 2-4 days. A very large or custom heater make take a week or more.
Do I need to reinforce my floor for a masonry heater?
Most installations require structural reinforcement due to the heater’s weight (4,000-10,000 pounds). A professional assessment determines specific needs like concrete footer/pads or steel post and beam.
Can I install a masonry heater in an existing home?
Yes, masonry heaters can be retrofitted into existing homes. You’ll need adequate space, proper structural support, and a suitable chimney system. Many homeowners successfully install during major renovations.
What’s the difference between correctly sizing my masonry heater and over-sizing it?
Correctly sizing ensures optimal performance. An appropriately sized heater heats your space efficiently with one fire per day. Over-sized heaters produce too much heat, forcing smaller fires that reduce efficiency.
How much does it cost to install a masonry heater?
Installation costs range from $8,000 to $25,000+, depending on size, design, materials, and labor rates. Additional costs include structural reinforcement, chimney systems, and site preparation.
Leave a Reply